lindaikeji35

  • Subscribe to our RSS feed.
  • Twitter
  • StumbleUpon
  • Reddit
  • Facebook
  • Digg
Showing posts with label DIY. Show all posts

Saturday, June 18, 2011

The Surly Cross Check: a Colourful Build

Posted on 10:49 PM by dvdsvdsdv
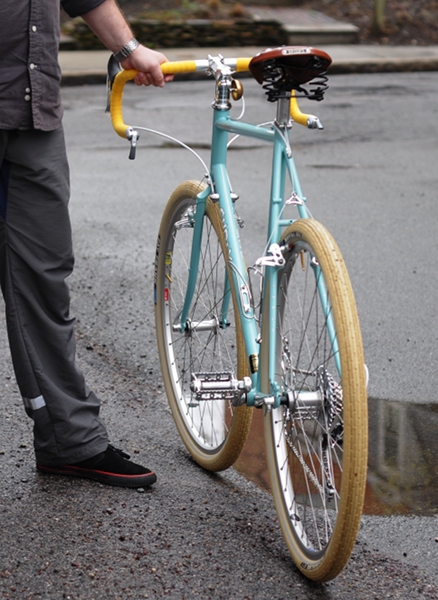
Two months ago, the Co-Habitant got a Surly Cross Check frame that he wanted to build up as a fun on/off road bike around a touring wheelset with fat tires that we already had in our possession. He is getting a nice roadbike later this summer (waiting for the frame to be finished!), and the Surly was meant to be "the other bike" - a playful, go-anywhere bike built around an inexpensive frame, mostly using components we already had. He swiftly put the bike together and has now cycled about 500 miles on it. The Cross Check is technically a cyclocross frame, but it is versatile and can also be used for touring and commuting. Given its unusual build, we've had many questions about this bike and so I offer a review on the Co-Habitant's behalf.

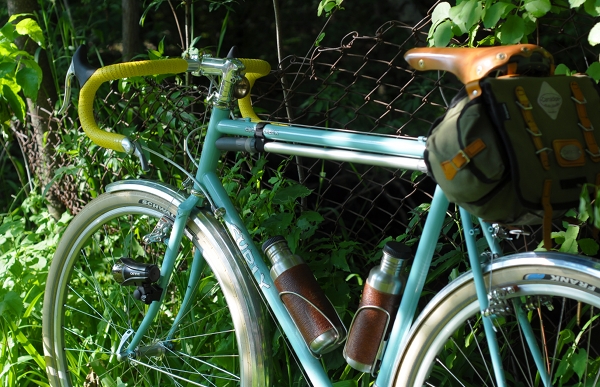
The most noteworthy aspect of the build, is that we were able to fit the frame with Schwalbe Fat Frank tires and metal fenders. This looks great, and the tires feel awesome, but to tell the truth the whole thing was a pain. The Cross Check is described as being able to fit tires up to 45mm with fenders, but the Fat Franks are 50mm. It was a tight fit that required some DIY. Initially we wanted to use Berthoud steel fenders, which are available in 700Cx60mm, but the Co-Habitant was not impressed with their quality upon seeing them in person. He also dislikes plastic fenders and did not want to use SKS. In the end he decided to get the Velo Orange Zeppelin 700c x 52mm fenders (which are rated for 42mm tire), and "massage" them to fit.

Out of the box, the fenders were too tight: The edges touched the sides of the tires and there was not enough space under the brake bridge and behind the seat tube to mount them high. So, the fenders had to be opened up. But when you open up a fender that's 52mm, it no longer follows the line of a 700C tire, instead making the opening much smaller. So while opening the fender, it had to also be stretched out -  taking care not to crimp the edges. To do this, he used a flat low table holding the fender upside down against its surface and pressing down gently, rolling it end to end - opening and pressing down. Pressing down would close the fender and opening it would alter the curvature, so the back and forth balanced out the opposing forces.

For the front fender there was sufficient clearance underneath the fork crown, but in the rear there was less clearance - the brake bridge is quite low and the chainstays are short. He had to dent the top of the rear fender (which isn't visible) in order to get it closer to the brake bridge, then fabricate a custom circular-L-bracket to hold the fender in place, screwed into the eyelet of the brake bridge. To dent the fender, he placed it on some clothing on the top edge of the back of a chair, then hit it with a rubberized end of a pedal wrench, creating a grooved dimple. He also had to dent the ends so that they wouldn't pinch near the bottom bracket. It was a bit of an ordeal, and if you are going to attempt this beware that it is easy to ruin the fender - it may not be a risk worth taking.

Happily, the "massaging" was a success and the Cross-Check looks great with the fat cream tires and the VO Zeppelin fenders. The ride is fast and cushy, and the Co-Habitant is discovering just how addictive wide tires are. On the downside, the clearances between the tires and fenders are so tight, that the set-up is not really practical for serious off-road cycling: stuff can get caught in there and cause problems. But for fire trails and gravel paths it is fine, and if he decides to do anything more serious (like the D2R2!), he will remove the fenders.

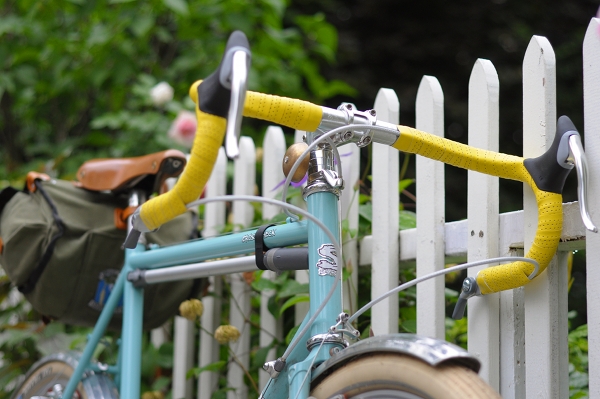
The rest of the build for this bicycle has mostly already been described here, but a few changes have been made since then. The original shortish stem has been replaced with a 9cm stem, flipped upside down. The original yellow cloth tape got filthy and tattered fairly quickly, so we replaced it with Fizik tape. Initially, the cloth tape was supposed to be shellacked to a warm caramel - but the bright yellow looked so "right" on this bike, that it began to seem like an inherent part of its personality and he decided to keep it that way. He also added a frame pump, lamenting the lack of pump peg and using a strap to hold it in place.

After two years in a lukewarm relationship with his Brooks Flyer saddle, he decided to sell it and replace it with a Berthoud touring saddle - the male version of the one I now have on my Rivendell. So far he loves it.

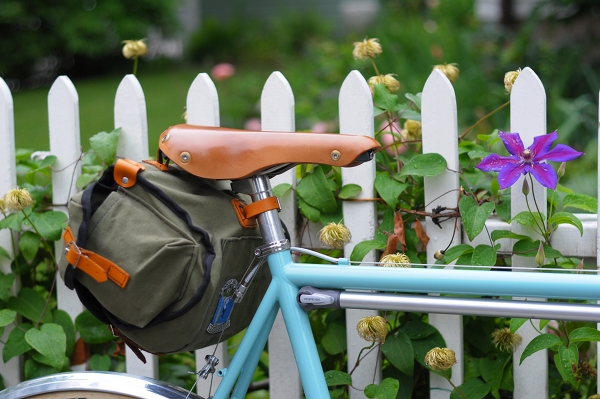
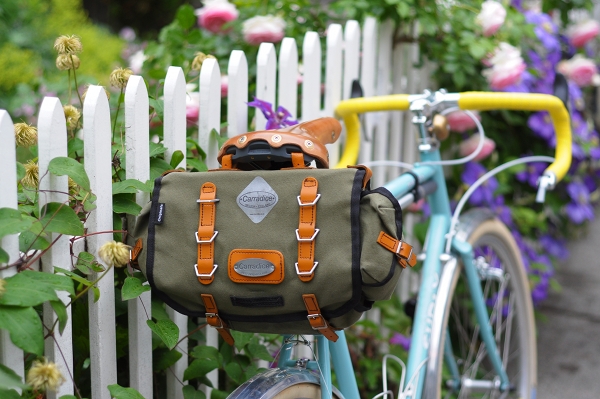
He fitted the bike with the Carradice bag that used to be on his old bike.

It now has a patch on it, to cover the tear that happened as a result of the bag rubbing over the brake cable on his old bike.

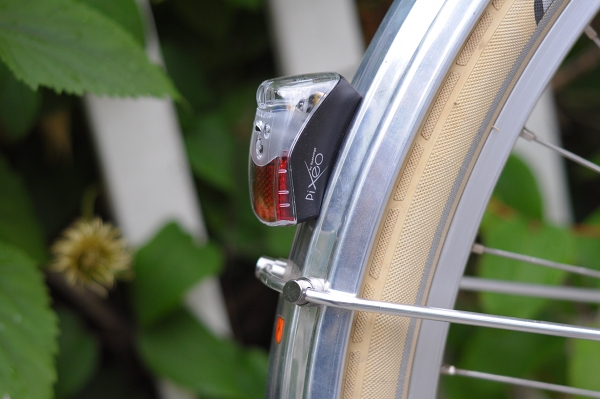
He affixed a CatEye headlight to a braze-on on the front fork, and a Spanninga Pixeo tail light to the rear fender.

He tried to liberate himself from clipless pedals and rode the bike with touring pedals for a few weeks, but ultimately could not take it anymore and put his old clipless pedals back on. Fair enough, but this does limit the versatility he originally had in mind for the bike.
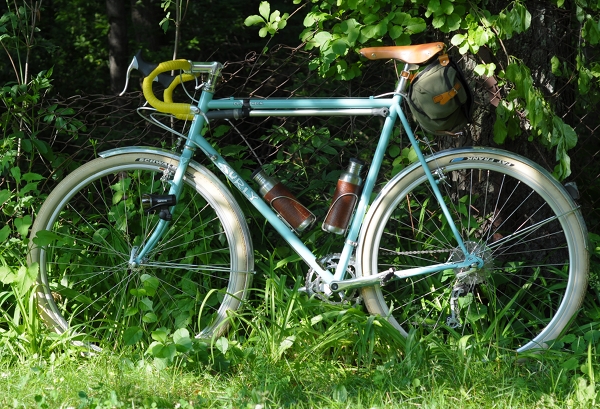
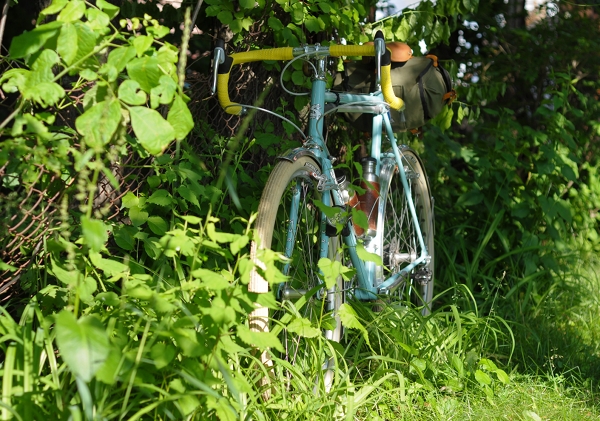
After riding the Surly Cross Check for two months, his main feedback is that the bike is faster than he expected - even with the wide tires and a bunch of weight in the saddlebag. While initially he intended to use the Cross Check in conjunction with his old Motobecane until he got his new roadbike, the Motobecane was retired as soon as he started riding the Surly - no need for it, since the Cross Check did everything it could do and more. He does not find the bike sluggish, and it seems that the tubing is just right for someone of his stature (6ft/ 200lb+). Overall, he is pretty happy. Though he likes lugs, he also likes a nicely done TIG-welded frame and the Surly suits him just fine.

My take on his Cross Check... I think it is a well-made, attractive frame for the price and I am glad that he finds it comfortable and fast. To be honest, I think that at least to some extent this build was not so much about practicality, as about doing a fun and challenging project using a bunch of components that we had acquired but had no use for. If the original purpose of the bike was off-road, then the tire+fender combo with such tight clearances does not really make sense. I have a feeling that he will end up using it mainly on the road, because I can't imagine him bothering to remove and reinstall the fenders every time he wants to take it on serious trails. And this means that when he gets his long-awaited road frame later this summer, the functionalities of the two bikes will overlap considerably. Not that there's anything wrong with that. But given how much he likes the Surly I am almost worried that he might be disappointed with the special bike he's waiting for. Well, hopefully not.

On a more general note, while the Cross Check is clearly versatile enough for commuting and touring, I wonder whether many cyclists actually use it for cyclocross racing. I have a hard time imagining that, given how relatively heavy it is - even the floor models with narrower tires and sportier components. But maybe I'm just biased from having handled too many lightweight bikes recently.

The Surly Cross Check is a fun bike with a cult following, and it is particularly impressive how customisable the frame is. With its happy colours, fat cream tires, elegant fenders and classic touring accessories, the Co-habitant's Cross Check is distinctly his own.
Read More
Posted in bicycle reviews, Co-Habitant, diamond frame, DIY, Surly | No comments

Tuesday, May 3, 2011

Simple Solution for Unforeseen Groceries

Posted on 9:05 PM by dvdsvdsdv
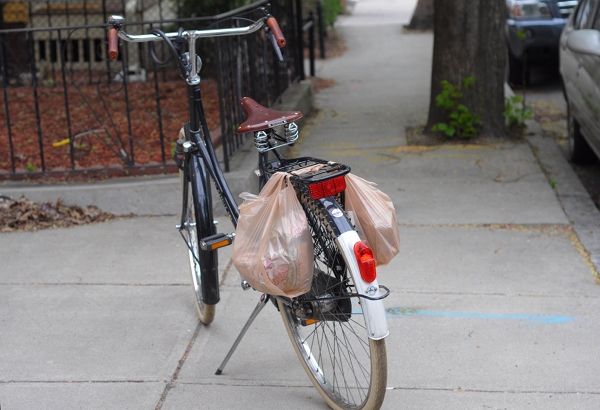
I have now stopped using the Urbana bike that I was test-riding in April and have gone back to my Gazelle. While overall I prefer the Gazelle, I do miss some of the Urbana's neat features and have been trying to devise ways of making the Gazelle just as accommodating. Among other things, I want to find a DIY solution that will emulate the utility of Urbana's fantastic rack that accommodates any grocery bag without requiring panniers. I thought hard, but could not come up with anything... until fate did it for me. If you haven't fainted yet from my use of plastic bags, perhaps you'll appreciate this.

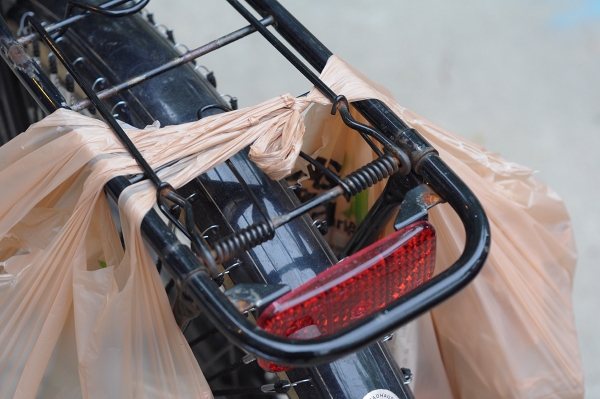
Yes, two bags tied together and turned into "panniers." It was totally impromptu. We were cycling past a grocery store just as it was about to close, when we realised that we had neither anything to eat at home, nor anything to carry it in if purchased. We ran in and bought some food, thinking we'd carry it home on the handlebars. But then, in a flash of brilliance, the Co-Habitant created the objet d'art you see here. We cycled home ridiculously happy. I guess this is what one of my readers meant when he wrote that "a peasant in any number of countries with a million plastic bags can figure out and equal number of ways of carrying their stuff."

Question: Why would one even buy dedicated grocery panniers, if they can take a pair of reusable canvas bags, connect them by the handles (with an S-hook or a bungee cord), and secure them to the rack either via rat trap or via the same bungee? I realise that the plastic bags in my pictures look horrible, but a pair of nice reusable shoppers could look as good as panniers while also being more versatile and costing just a fraction of the price. Does it just not occur to people in the same way it did not occur to us? While I am delighted to have this method of carrying groceries in a pinch, I am also feeling foolish that I did not think to do it earlier. It takes skill to recognise simple solutions, and that's a skill I would like to develop.
Read More
Posted in bags, DIY, food, Gazelle | No comments

Saturday, April 30, 2011

Surly Progress and a Couple of Glitches

Posted on 9:19 PM by dvdsvdsdv
We are nearly done building up the Co-Habitant's Surly Cross Check, and here is an update on the progress:

As mentioned previously, we got this frame to build up as a fun off-road bike. We already had the wheelset, Fat Frank tires, handlebars, saddle, pedals, and some other components, making the remaining build fairly easy and financially feasible.

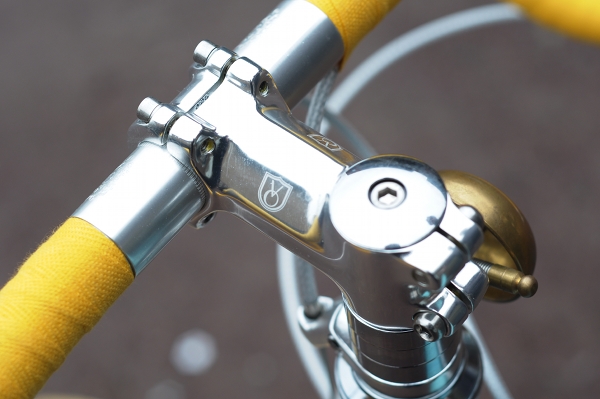
Among the new components we bought were the Velo Orange threadless headset and stem. Though we do not plan to transition to threadless stems, they do make life easier in some respects - such as making it possible to remove the handlebars without redoing the bar tape and lever placement. And as far as threadless stems go, the VO is rather nice looking.

The brass bell is mounted on one of the spacers, which mechanic Jim tapped for us when we were picking up the frame from Harris Cyclery.

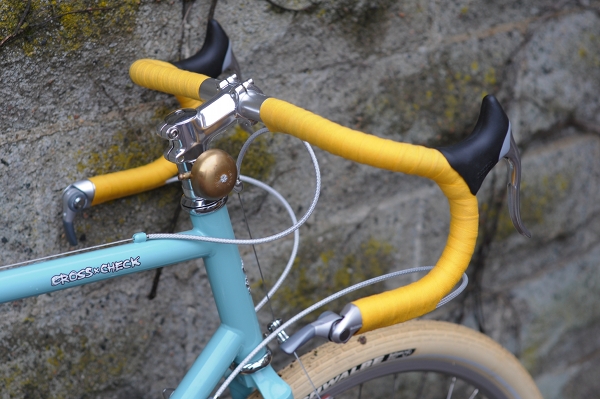
The handlebars are only temporarily yellow - Once we shellac them, they will turn caramel to match the saddle. But the bicycle does look kind of cute with them as they are, like an enormous children's toy. The "maiden voyage" was on Easter Sunday, and the colour scheme was certainly appropriate.

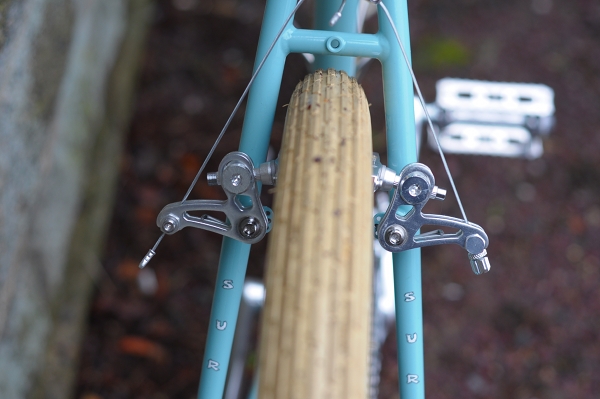
We also bought these Velo Orange Grand Cru MK2 cantilever brakes, which I think are just beautiful. Unfortunately, after riding with them for 27 miles the Co-Habitant is not sure whether he is happy with their functionality. In his opinion they do not perform as well as the Tektro cantilever brakes I have on my Rivendell - so he is not sure what to do. It is not a safety issue, since the VO cantis still outperform the old centerpulls he has been using on his Motobecane for the past two years. But he doesn't want to feel as if he is sacrificing performance for looks or "vintageyness," and he thinks that this may be the case here. Has anybody else tried these?

Similarly, he has mixed feelings about the VO metallic braided housing. While beautiful, the brake housing is very stiff and has considerably more friction than the Jagwire we are accustomed to using. I asked about this on bikeforums, and apparently stiffness is a known trait of this particular housing - which is why some avoid it, and others use it only with vintage non-aero brake levers. I wish we had known that before buying and installing the stuff. But now that it's already done, we are trying to determine whether it will perhaps become less stiff over time. Is that a possibility, or just wishful thinking?

The final disappointment is with the fenders, or lack thereof. We had initially ordered the 700Cx60mm Berthoud fenders, which, by all accounts and calculations should have been a perfect fit. The first problem was that the fenders arrived damaged: a crushed box, courtesy of UPS. We filed a damage report and will be returning them, with the hope that the seller will be fully reimbursed. But when examining the fenders, it also seemed quite apparent to us that even had they been intact, they would not fit. In fact, we are genuinely wondering whether the set we received was mislabeled, because they simply don't look like they can clear the 50mm tire.  Now we are confused as to whether to ask for an exchange, or simply return them and try the SKS. The Co-Habitant does not like SKS fenders - but then he was not too happy with the quality of the Berthouds either (what we could see of it based on the undamaged parts) - so we are sort of at an impasse on this one.

These glitches aside, we are extremely pleased with the new Surly Cross Check. It took us only one night to put it together, and in that sense a new frame is much easier to work with than an old one. By contrast, we constantly run into unexpected problems when building up vintage frames, which delays those builds by weeks and sometimes months (this is the case with my give-away touring bike, but more on that later). With the Surly, everything came together as expected, with no installation problems.

On its first ride, the Cross Check performed better than the Co-Habitant expected. He anticipated that it would be more comfortable, but slower than his vintage Motobecane roadbike. Instead, it is more comfortable and faster. He does not feel that the frame is too stiff, as some report, which can of course be due to his size and weight. And he definitely does not feel that the bike is in any way sluggish. As his riding partner, I have to agree: He is faster on the Surly than on the Motobecane. Hmm. We are eager to get the brakes and fenders issue resolved, so that he can ride it more - but so far he is impressed.
Read More
Posted in Co-Habitant, diamond frame, DIY, fenders, Surly | No comments

Wednesday, April 13, 2011

Staining Your Grips to Match Your Saddle

Posted on 9:46 PM by dvdsvdsdv
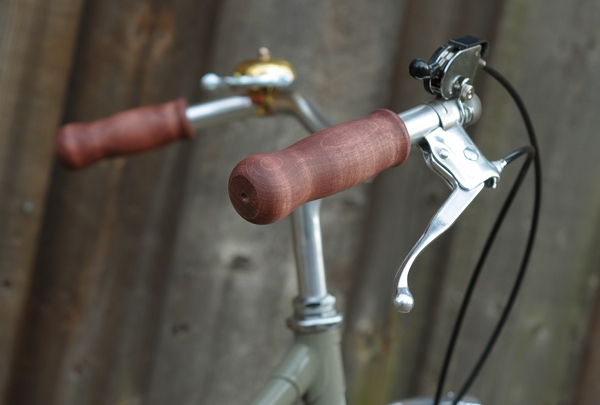
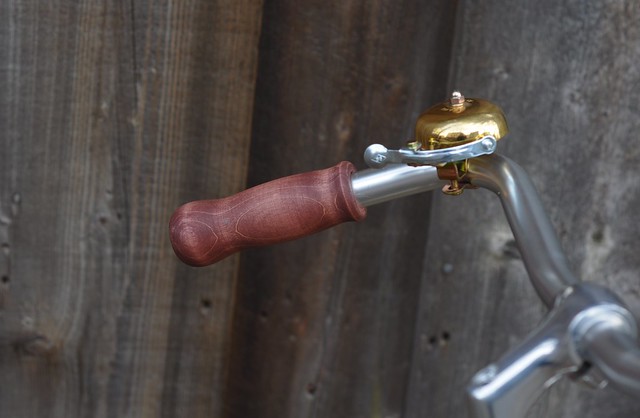
When I showed these pictures earlier, some of you noticed that the cork grips matched the bicycle's saddle and I explained that the grips were stained. Now I've done the same to my wooden grips, and will take this opportunity to describe the process for those interested.

What is staining?
Staining is inherently different from painting, in that the pigment gets absorbed into the surface, rather than sitting on top of it. This means that the natural texture of the material will remain prominent - the cork retaining its corkiness and the wood its woodiness. And unlike paint, stain won't crack.

Where to buy and what kind?
You can buy a small can of wood stain at any hardware store. There are many different kinds to choose from, all of which should work on both cork and wooden grips. I suggest choosing a stain that is oil-based, not water-based or synthetic. Oil-based stains permeate better, look more natural, and are more fade-resistant. 

Choosing a colour
If you are looking for a natural colour that will match a brown leather saddle, the main thing is to determine whether your saddle has yellow, red, or ashen (neutral) undertones. For example, Brooks "brown" has a red undertone to it, whereas Brooks "honey" has a yellow undertone. Velo Orange brown leather saddles are more or less neutral. A wood stain that is described as either cherry, mahogany, or redwood, or contains anything "red" in the name will, as you might imagine, have red undertones. A stain that is described as pine, or oak, or contains anything "golden" in the name, will have yellow undertones. A stain described as walnut, driftwood or ash will have neutral undertones. If you are trying to match a black saddle, look for ebony. This basic range of stain colours should be available at most hardware stores.  

Applying wood stain
Oil-based stains require ventilation, so you will need to apply the stain in front of an open window or outdoors. Stir the stain inside the container very thoroughly, as the pigment tends to separate and settle on the bottom of the can. Then apply stain to the grips using an inexpensive paintbrush. Apply very thinly. The stain should not be leaking off of your grips and you should be able to see the texture of the wood or cork through it at all times - remember that it's more like a dye than a paint: slowly work it into the surface, rather than attempting to paint with it. Wipe the excess off with a napkin or rag and stand the grips to dry on a newspaper. Don't worry too much if your application doesn't look perfectly even; if anything, that complements the natural variations in the material. There is really not a whole lot you can do to mess this up. 
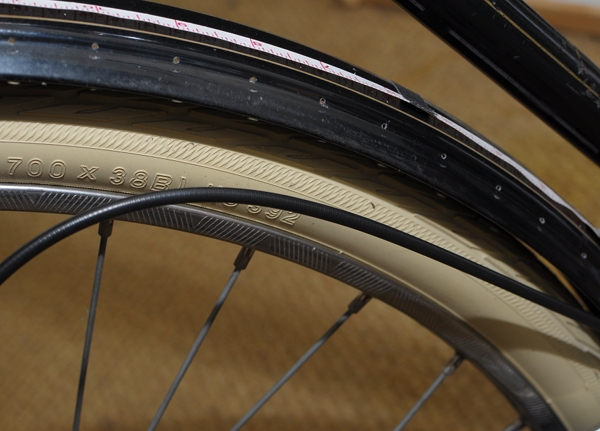
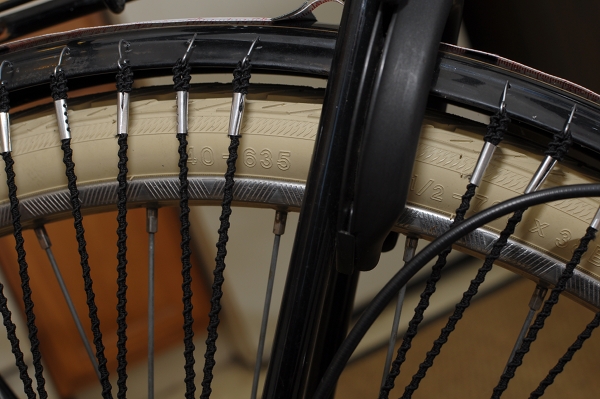
Allow at least 24 hours for the stain to dry, then decide whether you need another layer. For grips, one is usually sufficient. The more layers, the darker and more saturated the pigment will look. If desired, apply a layer of shellac after the stain is fully dry. The wooden grips pictured here are not shellacked, but the cork ones here are. 

And enjoy your beautifully matching saddle and grips. A pair of plain cork grips will set you back $10, and a small container of wood stain an additional $5. It's a fun and simple way to spruce up your handlebars. 
Read More
Posted in DIY, grips | No comments

Sunday, February 13, 2011

Hats Off!

Posted on 4:35 PM by dvdsvdsdv
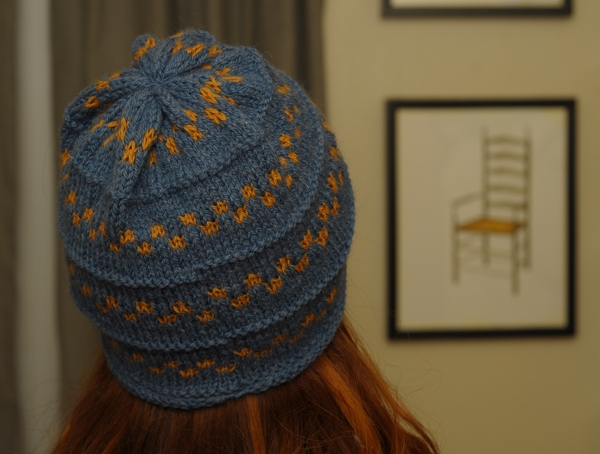
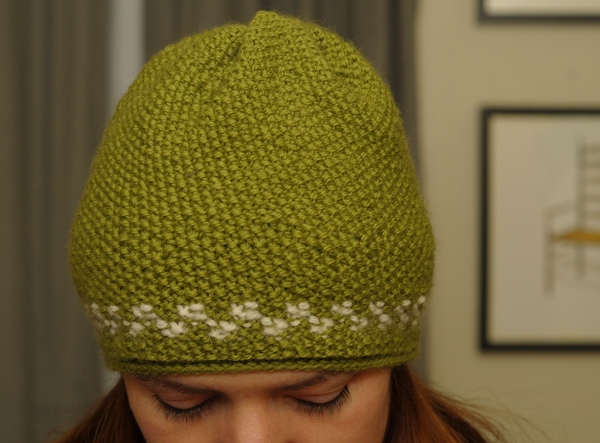
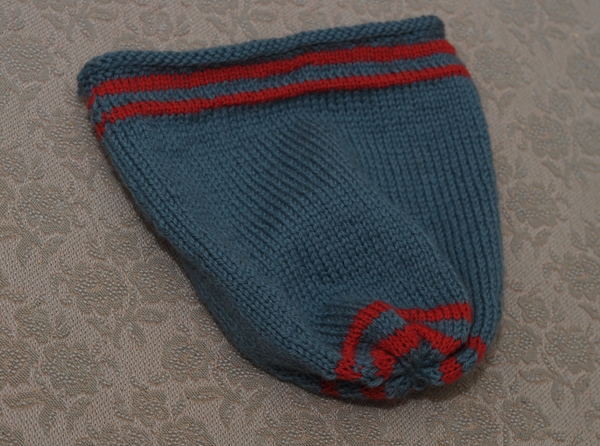
Because quite a few of you have ordered hats from me as part of barter deals via the Trading Post, I wanted to announce that: (1) I am now done with all the ones I promised thus far and they are going out in the mail on Monday, and (2) My waiting list has cleared and I am ready for more trades. Thank you for your interest in these, and I am happy to make them. I have problems with the nerves in my hands and knitting is a good form of physical therapy for that - so it's great to be "forced" to do it. While I am not looking to start selling hats, I am more than happy to trade them for bicycle components and whatever other stuff might appear on my Trading Post "want" list. Since I've received a lot of questions about the hats, I thought I'd provide some details here, and link to this post whenever someone has a question. Please feel free to skip if this is not of interest.

Materials and Patterns: I use a soft 100% Peruvian wool. I have a very good source for the wool now and can get pretty much any colour you want. I don't use patterns, but make up my own designs.

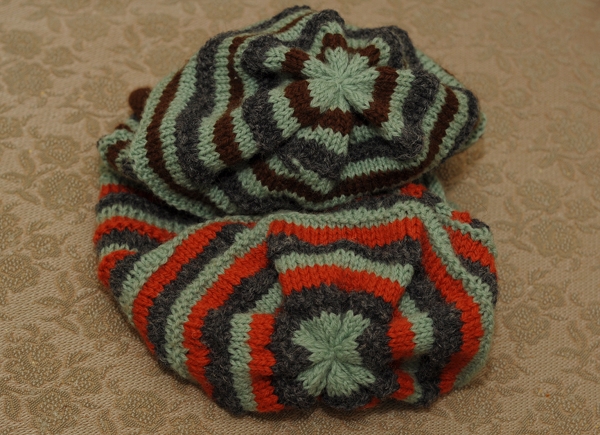
Styles: I can make three basic type of hats in many variations: a ski-hat ("beanie"), a rounded Scandinavian style hat, and a slouchy beret. I don't make hats with ear flaps or visors.

Texture: Most of my hats have some textural variation to them. This adds structure to the hat, as well as visual interest - especially when the hat is all one colour. If you prefer them to be smooth, that is fine as well.

Extra warmth? By default, the hats are warm and wind-proof. But if you want one that is extra warm, I can do that by using stitching that makes the hat thicker.

Summer hats? I can also make a summer weight beret using a delicate cashmere blend.

Colour combinations: Hats can be made single tone, or in various colour combinations. I like stripes and organic forms. If you have something specific in mind, let me know!

Which hat for under a helmet?  If you want a hat specifically to wear under a helmet, I recommend opting for a ski hat with no textural variation. The colour combination of course does not matter.

Trade value? No idea. So far I've traded for things like handlebars and vintage camera equipment, and multiple hats for a (new) wheelset. The more complicated the pattern, the more time consuming a hat is to make, but I have no concrete value system in place.  I am not looking to start a hat business or to market these. It's just a fun way to trade and thanks again for the interest!
Read More
Posted in clothing, DIY, handmade, knitting | No comments

Thursday, January 13, 2011

On Bicycle Maintenance and Limitations

Posted on 10:35 PM by dvdsvdsdv
Some food for thought for those who believe that all cyclists must do their own maintenance and repairs: Not everybody has the physical strength for it. I've lately spoken to several persons who have sheepishly admitted this, and were then relieved to hear that I have the same problem. My personal weak point is lack of hand and upper body strength, which can result in difficulties with even routine tasks.  For example, I am not always able to open the quick release levers on wheels. On some bikes it's easy, but on other bikes I simply can't - no matter how hard I pull.  Similarly, tires can be difficult to get off the rim: With some wheel and tire combinations I can work the tire iron until I am red in the face, but it won't budge and the tire refuses to come off. It is frustrating, because with many bicycle repair tasks I can give precise step-by-step instructions to someone else, but just can't physically do the work myself. And it's even more frustrating to watch the Co-Habitant do in 2 seconds what took me 10 minutes of panting not to be able to do.

From the correspondence I get, I know that there are cyclists out there who feel sad when they read unkind remarks on bicycle websites about those who don't do their own maintenance. If bicycle repair is easy for you, that's super. But please keep in mind that it is not easy for everybody. After all, just because knitting and sewing are easy for me, does not mean that everyone who buys their clothes ready-made is "just being lazy." Some people have arthritis, others have a bad back, others still are simply not strong enough - or even not dextrous enough - to work on their own bicycle. In areas where cycling is more common, this is acknowledged as "normal" and people are not expected to repair their own bikes unless they are enthusiasts. But in the US there is often an "oh please!" mentality when a cyclist mentions that they don't work on their own bicycle.

The way I see it, it is helpful to be aware of your limitations and to plan accordingly. If you can't repair a flat, accept it - and be prepared. Buy tires with good puncture protection. Know where all the bike shops are in the area where you travel, in case there is a problem and you need support. Know where the nearest subway, train and bus stations are. Carry a mobile phone, cash and a credit/debit card as a matter of course, in case you are stranded in the middle of nowhere and need to call a friend or a taxi to get you.  And most importantly, please don't feel bad if you can't do repairs on your own - you can certainly still ride a bike! We are all good at some things and bad at others, and there is not a thing wrong with that.
Read More
Posted in DIY | No comments

Monday, January 3, 2011

Woven Dress Guards for Drilled Fenders

Posted on 2:00 PM by dvdsvdsdv
I love the look and feel of woven dress guards. To me they seem more graceful than the solid vinyl type - allowing for the wheel's spokes to remain visible, while still protecting clothing from flying into them. They can also give a bicycle more "personality," as there are many patterns and different installation methods to choose from. A year ago, it was almost impossible to obtain dress guards like these without making them yourself. However, now there are several options available and I have done my best to get my hands on them.

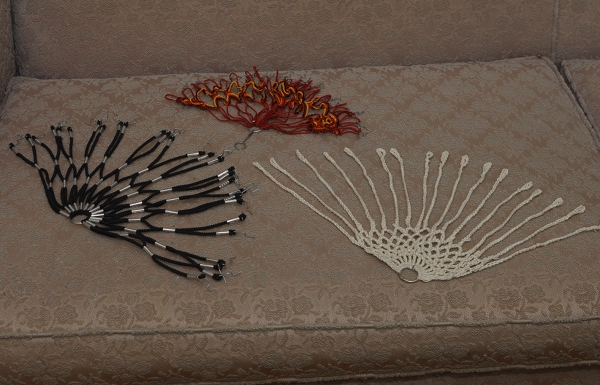
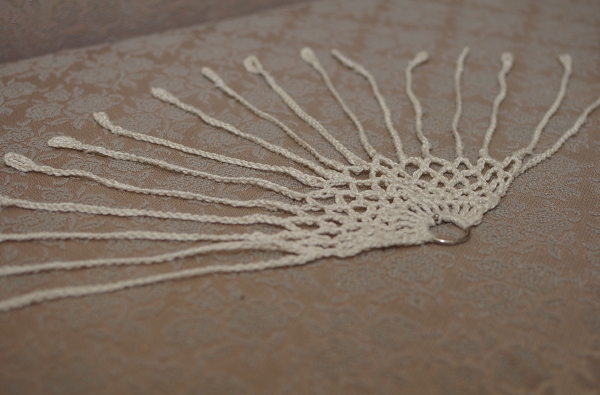
Some of the most beautiful woven dress guards available today are these handmade ones by Bobbin & Sprocket. They can be crocheted in different patterns, according to your specifications (you can see them here on Bobbin & Sprocket's own bike and here on an ANT bike). I ordered a set for my mixte a couple of months ago, but have yet to attach them - because I've decided to do a drilled-fender installation, rather than use the clips provided. The clips don't attach securely enough for my fenders - and I am weary of having the guards fall off and get tangled in my wheel spokes. Earlier, I reviewed the Dutch Simeli dress guards, and clip and fender compatibility was also a problem (they only work on bikes where there is a lot of room between the fender and the tire).

For these reasons, I don't think clipping woven dress guards to fenders is the ideal solution, and suggest the traditional drilled-fender installation instead. I had this done to my vintage Raleigh DL-1 last year, using a simple set of dress guards that a reader had sent me from Portugal. The fancy ones in the picture above were a gift from a friend in Autsria, and are waiting for the right bicycle.

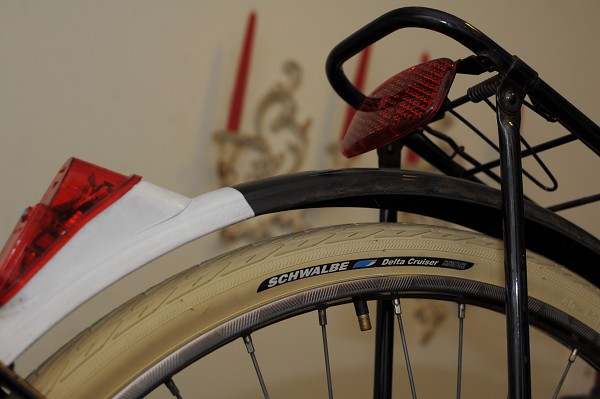
The ones I decided to install on my Gazelle were this set I bought from Mike Flanigan of ANT, who has recently begun to order them from Europe. They are simple, stretchy and durable, and I thought the colour scheme suited my Gazelle nicely.  Drilling fenders for dress guards may seem like a daunting task, but the actual act of installing them is not difficult, if you have a good drill. What's difficult is making the commitment: You can't "undo" the holes in your fender once they are there, and nearly every set of dress guards requires a different number of holes.

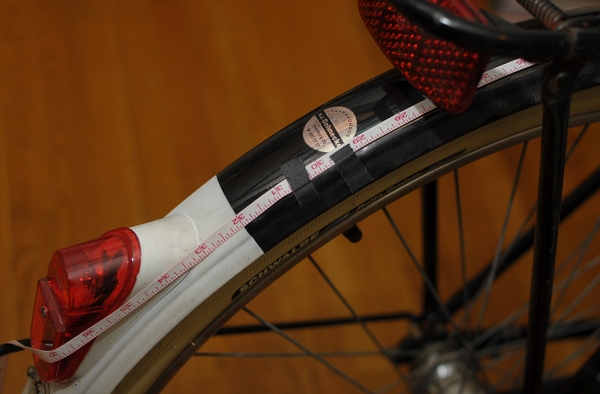
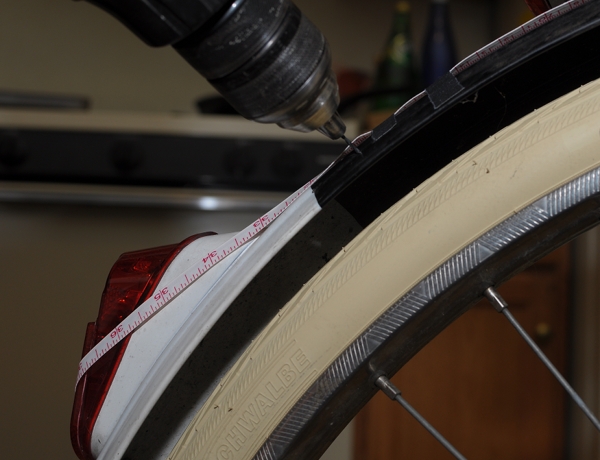
The first step is to consider what part of the wheel you want the dress guards to cover. There is no right or wrong in this regard: If you look at vintage dress guard installations, they are all over the place. Some prefer to cover 1/4 of the wheel, others prefer to cover the entire top half, and others still prefer something in between. Once you choose the coverage area, mark its beginning and end with masking tape. Then, evenly attach a tape measurer along this area. This will allow you to easily mark where the holes are supposed to be. The dress guards I used required 28 holes, which ended up being 1" apart.

Depending on what bike you have, you do not necessarily need to remove the rear wheel or even deflate the tire when drilling the holes. On Dutch bikes and English Roadsters, there tends to be so much room between the tire and fender, that if you insert the drill bit as far inside the drill as it will go, it will be too short to reach the tire after piercing the fender.

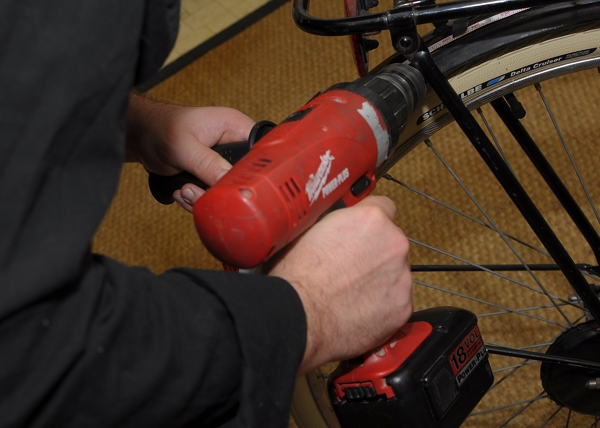
The hooks that come with dress guards are about as thick as medium-sized paperclips, so 1-1.5mm is a good size for the holes. We used a 1mm drill bit.

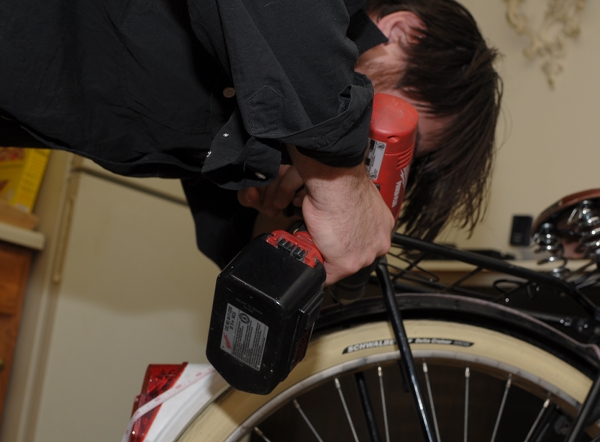
It is good to have a drill with a side handle attachment, as this allows you to keep your hands steady and to have more precise control over the drilling.

I would also suggest using a fresh drill bit and having a spare one before you start, in case it breaks. 

And here we go!

If you measured correctly, the holes should look fairly even - but if not, don't panic. These things are meant to have a hand-made look to them and are forgiving of small mistakes.

Inserting the hooks into the holes is fairly straightforward. One additional step to consider, is leaving room for the "cafe lock" if your bicycle has one. This should be done at the time you are measuring for holes in the first place.

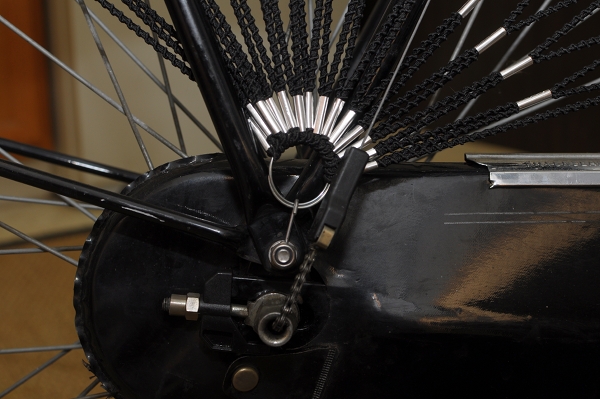
At the drop-outs, the dress guards are typically attached to a bolt using a hook that is provided with the guards. (You will have to remove the nut, then insert the hook, then retighten the nut.) You may have to play around with how you angle that ring to which the cords are attached: The rack stays, the shifter cable and the hub indicator chain may interfere with it, and then you sort of have to angle the ring and insert it over/under, as applicable. Every bicycle is different in this regard, so it is impossible to give precise instructions here.

The important thing, is that in the end nothing sticks out in a way that can catch on your clothing. For example, we crimped the hook on which the ring rests, downward.

And that is pretty much it. Describing the process step by step in itself makes it seem complicated, but it only took us an hour - which I think is good, considering that it was our first time and we were afraid of messing up. You can see the finished installation in an outdoor setting in this post. Looking at the final result, one could say that these guards could look better if they were fanned out over a wider area - but I wanted the coverage to be denser. It's really a personal choice, and I am pretty happy with how mine have turned out. If you own a drill, this method of dress guard installation is worth considering.
Read More
Posted in Co-Habitant, DIY, dress guards, fenders, Gazelle | No comments
Older Posts Home
Subscribe to: Posts (Atom)

Popular Posts

  • Computer Games
    I have never liked computer games, but with the influence of the Co-Habitant I am finally starting to get into them. Here he is, taking a br...
  • Upside Down!
    Fate has been kind to Marianne! Rather than being torn apart for donor components , she has been spared, and fitted with new handlebars. Wha...
  • Matters of Identity
    Well... I thought that I could quietly change my blogspot username without anybody noticing or caring, but it's caused some confusion. S...
  • Celestial Beings
    [image via Spernicelli ] Depending on who you speak to, it is either the most over-rated vintage bicycle in existence, or the Holy Grail: Th...
  • The Pashley Roadster Sovereign: Review After Two New England Winters
    If you are a regular reader, you probably know that the Co-Habitant owns a Pashley Roadster Sovereign. We bought a pair of Pashleys  when I...
  • Crime vs. Accident?
    I was cycling across town with a friend today, who suggested that we take the side streets instead of my usual route along the major roads. ...
  • Putting Your Foot Down
    Enough people have asked me about this now that I thought it worth writing about: How do I put a toe down in traffic while remaining on the ...
  • Pulling the Trigger vs Doing the Twist: Thoughts on 3-Speed Gear Shifters
    On bicycles with internally geared hubs, we typically see two types of gear shifters. The trigger shifter (pictured above) is a small gadget...
  • Manufacturers with 'History': Does Continuity Matter?
    What does it mean, when we say that a bicycle manufacturer has a long history? There are manufacturers out there, whose names are legendary ...
  • An Igleheart and a 'Sex Hub'
    At the New England Bicycle Expo  a couple of weekends ago, I had the pleasure of meeting legendary New England framebuilder Christopher Igle...

Categories

  • ANT
  • art
  • bags
  • basket
  • beginners
  • Bella Ciao
  • bicycle events
  • bicycle industry
  • bicycle reviews
  • bike friends
  • bike shopping
  • blog development
  • blogiversary
  • books
  • Boston
  • Brompton
  • Brooks
  • Cape Cod
  • cargo bikes
  • cars
  • cats
  • children
  • clipless
  • clothing
  • Co-Habitant
  • coaster brake
  • comfort
  • Constance
  • countryside
  • diamond frame
  • DIY
  • DL-1
  • dress guards
  • drop bars
  • Eustacia Vye
  • fashion industry
  • fenders
  • films
  • fixed gear
  • flowers
  • food
  • framebuilding
  • Gazelle
  • Geekhouse
  • gender
  • give-away
  • grips
  • handlebars
  • handmade
  • holidays
  • Interbike
  • Italian bicycles
  • Jacqueline
  • knitting
  • lights
  • local bike shops
  • locking up
  • loop frame
  • lugs
  • Maine
  • Marianne
  • mercian
  • Mercier
  • mixte
  • Moser
  • Motobecane
  • Myles
  • night time cycling
  • North Shore
  • paceline
  • Pashley
  • pilen
  • poll
  • product reviews
  • racks
  • rain
  • Raleigh
  • Randonneur
  • randonneuring
  • restoration
  • Rivendell
  • roadcycling
  • rod brakes
  • Rodney
  • Romania
  • Royal H
  • Royal H. Mixte
  • saddles
  • safety
  • Seven
  • shop visits
  • silliness
  • skirt
  • social commentary
  • Soma
  • somervillain
  • stories
  • summer cycling
  • sun and heat
  • Surly
  • tandem
  • technique
  • test rides
  • tires
  • tools
  • traffic
  • trails
  • transportation options
  • travel
  • unpaved
  • urban cycling
  • Urbana
  • Velo Orange
  • Velouria
  • Vienna
  • vintage
  • winter cycling

Blog Archive

  • ▼  2011 (236)
    • ▼  September (17)
      • Frills or Basics?
      • European City Bikes and the North American Market
      • Thoughts on Fixed Gear Cranksets?
      • From Holsters to Corsets: The Cycling Accessory Fe...
      • Yeah Baby! Transportational Elegance Reigns at Int...
      • Handmade Bicycles at Interbike
      • Bleak Prognosis for the Dutch Bicycle?
      • GB Components Are Back! ...And You Can Have Their ...
      • Song, Dance and Bicycle Romance: The Interbike Fas...
      • On Bicycle Reviews
      • What's the Difference?
      • In the Raw
      • Frames of Mind: Why Did We Not Cycle?
      • Embracing Wrinkles
      • Reunited
      • The Art of the Ride Report: a Touring Bicycle Give...
      • If a Branch Falls in a Forest...
    • ►  August (22)
    • ►  July (26)
    • ►  June (27)
    • ►  May (27)
    • ►  April (26)
    • ►  March (30)
    • ►  February (30)
    • ►  January (31)
  • ►  2010 (262)
    • ►  December (28)
    • ►  November (29)
    • ►  October (24)
    • ►  September (23)
    • ►  August (25)
    • ►  July (25)
    • ►  June (20)
    • ►  May (19)
    • ►  April (20)
    • ►  March (17)
    • ►  February (18)
    • ►  January (14)
Powered by Blogger.

About Me

dvdsvdsdv
View my complete profile